
Set Up .TEL Domain
Having your own .TEL domain is a great way to easily share your contact details with others. It’s like a virtual business card that’s always up-to-date.
.TEL domains are different from regular domains. You have to manage your contact details using Telhosting account, which comes included with your domain purchase.
For everything to work correctly, .TEL domain needs to be set up. Follow these steps to get everything set up. Once set up, you can begin managing your contact information.
Step 1: Use Correct Nameservers
Telnames, registry operator of .TEL domains, provides it’s own type of hosting called Telhosting to allow registrants manage their contact information. For this reason, your .TEL domain must point to their nameservers (not ProjectArmy’s or any other third-party’s nameservers).
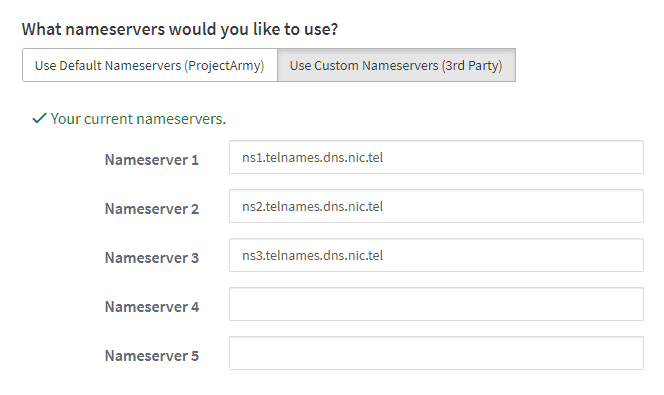
.TEL nameservers are:
ns1.telnames.dns.nic.tel
ns2.telnames.dns.nic.tel
ns3.telnames.dns.nic.tel
You can easily update nameservers by visiting your domain’s management page and clicking on Nameservers. Changes to nameservers will take several hours to propagate, up to 24 hours.
Once you update nameservers, this is what it should look like:
Step 2: Create Telhosting Account
Telhosting account comes included with your domain purchase. There are no additional fees. You’ll need to create an account to manage and publish your contact information.
- Go to https://www.do.tel/signup/ to start 3-step process.
- In step 1, enter your .TEL domain and click
Go - In step 2, you will be sent a pin number to the email used to register .TEL domain. The email subject line will be "The last step to verify your .tel domain on DO.TEL". Enter the pin and proceed to step 3.
- In step 4, you will be able to set your username and password.
Once you finish creating your Telhosting account, you can login to manage domain at https://www.managemy.tel/g3/login.action